Right, so Valentine’s Day is coming up, and you fancy making something handmade instead of just buying a card from the shop. Maybe you’ve been wanting to try watercolour, but you’re worried it’s too difficult, or you’ve tried before and ended up with muddy messes.
I just started painting with watercolours this January (you can read about my watercolour journey here), and Valentine’s Day is brilliant for practising because hearts and flowers are quite forgiving shapes. You don’t need to be an artist to make something lovely.
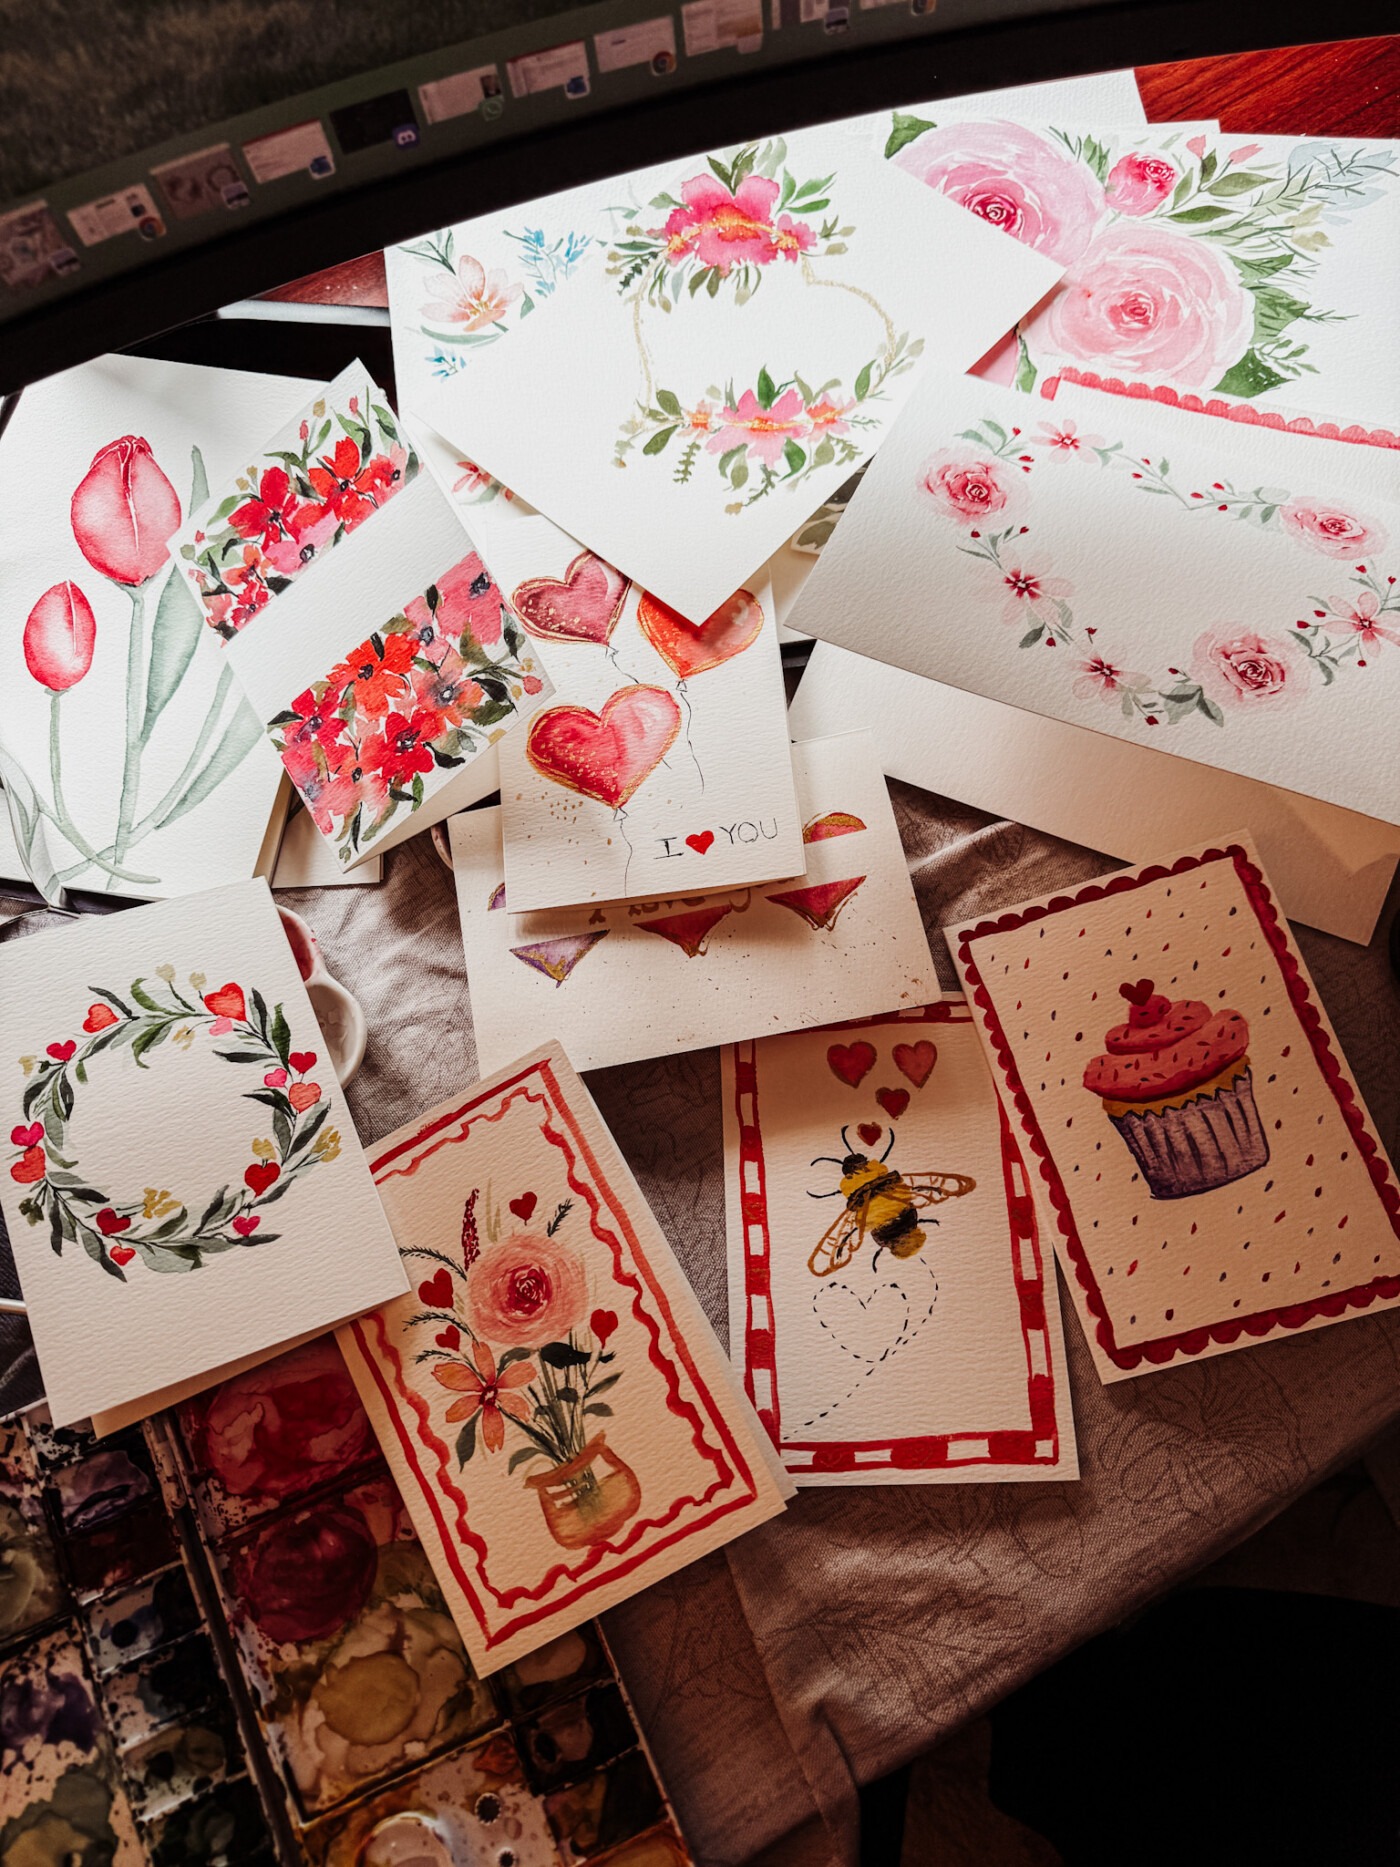
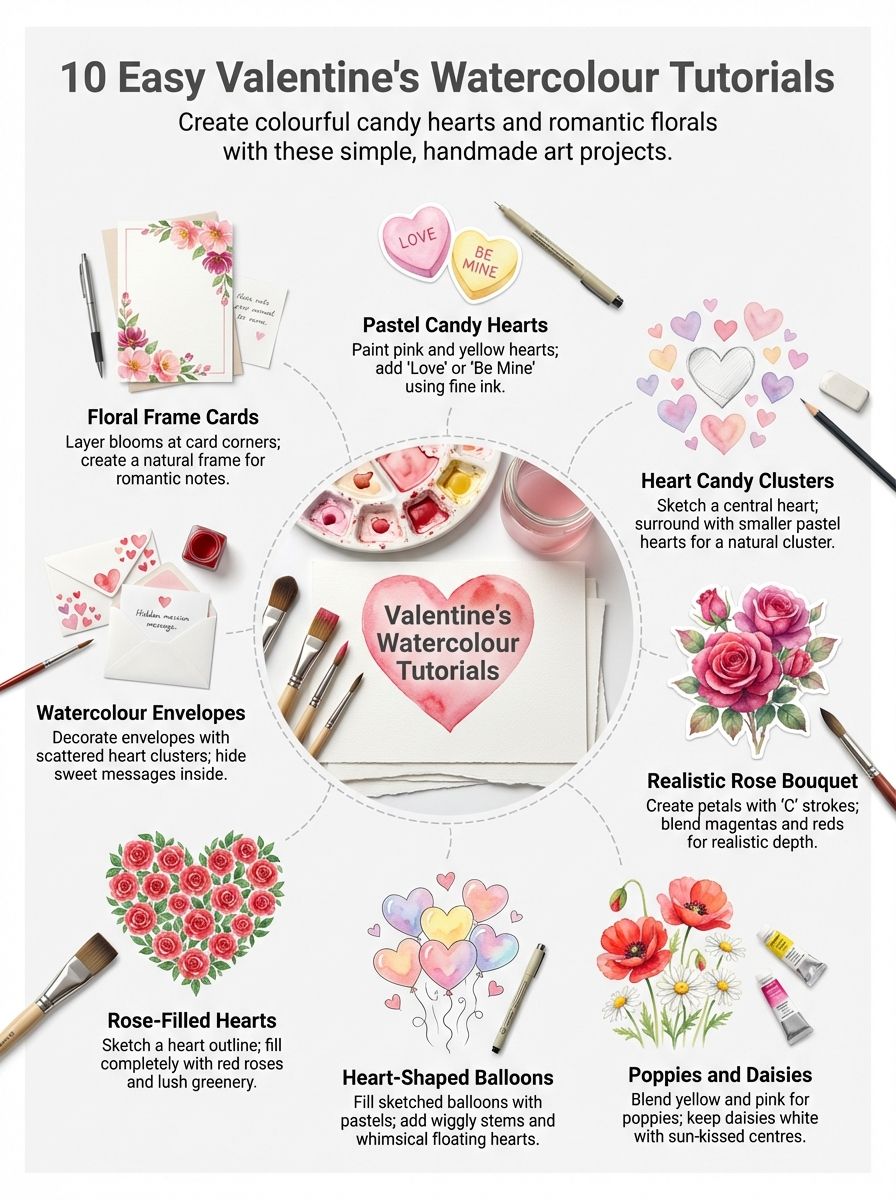
These Valentine’s watercolour tutorials are genuinely beginner-friendly. I’m talking simple shapes, basic techniques, and projects you can finish in under an hour. Whether you want to make Valentine’s Day cards, create art projects for the kids, or just have a relaxing, creative afternoon, these watercolour tutorials will work.
- Why Watercolours For Valentine’s Day?
- What You’ll Need To Get Started
- Before You Start: Basic Watercolour Tips
- Tutorial 1: Simple Watercolour Hearts
- Tutorial 2: Candy Heart Messages
- Tutorial 3: Watercolour Heart Cluster
- Tutorial 4: Simple Watercolour Roses
- Tutorial 5: Heart-Shaped Floral Wreath
- Tutorial 6: Watercolour Envelope Design
- Tutorial 7: Abstract Heart Backgrounds
- Tutorial 8: Watercolour Bouquet In A Mason Jar
- Tutorial 9: Rainbow Watercolour Hearts
- Tutorial 10: Simple Floral Card With Message
- Tutorial 11: Heart-Shaped Balloon Bunch
- Tutorial 12: Watercolour “Love” Lettering
- Tips For Making Your Watercolours Look Better
- Making Valentine’s Day Cards From Your Paintings
- Creative Ideas Beyond Cards
- Common Watercolour Mistakes (And How To Fix Them)
- My Honest Take On Watercolour For Valentine’s Day
- FAQ
Why Watercolours For Valentine’s Day?
Watercolours are perfect for Valentine’s Day for several reasons:
They’re romantic: The soft, flowing nature of watercolour paintings just looks romantic. The colours blend beautifully and you get that dreamy effect without even trying.
They’re quick: Unlike acrylics that need drying time between layers, watercolours dry fast. You can make a card in 20-30 minutes.
They’re beginner-friendly: You can’t really mess up watercolours. Even “mistakes” often look good. That’s the best part about this medium.
They’re inexpensive: You don’t need fancy supplies. Basic watercolour paper, a cheap set of paints, and a brush will do.
They’re unique: Handmade watercolour cards are way more special than anything you’ll buy in a shop.
What You’ll Need To Get Started
Before we dive into the watercolour tutorials, let’s sort out supplies. You don’t need loads of stuff.
Essential supplies:
Watercolour paper – This is important. Regular paper will buckle and pill when wet. Watercolour paper is designed to handle water. Get at least 140lb/300gsm weight. You can buy individual sheets or pads.
Watercolours – Either pans (little dried cakes of paint) or tubes. For beginners, a basic set of 12-24 colours is plenty. Student grade is fine to start.
Brushes – Get at least one round brush in medium size (size 6 or 8). That’s enough for most Valentine’s projects.
Water jar – Two if possible (one for rinsing, one for clean water).
Paper towel or cloth – For blotting your brush and cleaning up.
Optional extras:
Watercolour inks – These give more intense colours than regular watercolours. Not essential, but fun to experiment with.
White gel pen or white acrylic paint – For adding details or messages on top of dried paint.
Pencil and rubber – For sketching outlines before painting.
Masking tape – To tape your watercolour paper down to a flat surface so it doesn’t buckle.
Mason jar – Makes a better water container than a plastic cup (and looks nicer on your desk).
Salt – Sprinkle on wet paint for cool textured effects.
You probably have most of this already. If you’re buying new, you can get a basic watercolour set, paper, and brush for under £15-20 total.
Before You Start: Basic Watercolour Tips
These watercolour tutorials assume you’re a beginner, so here are some basics:
Paint consistency matters: Think milk or single cream. Too much water makes pale, wishy-washy colours. Too little makes it hard to spread. You’ll figure out the right balance as you go.
Let layers dry: If you want clean edges, let the first layer dry completely before adding the next. If you want colours to blend, paint while everything’s still wet.
Less is more: Don’t overwork watercolours. A few loose brush strokes often look better than fussing and fixing.
Embrace happy accidents: Watercolours do their own thing. Sometimes paint blooms or bleeds in unexpected ways – that’s part of the charm.
Work on a flat surface: Watercolours flow, so keep your paper flat, or the paint will run downhill.
Test colours first: Watercolours dry lighter than they look when wet. Do a test swatch first if you’re unsure.
Right, that’s enough theory. Let’s paint some Valentine’s things.
Tutorial 1: Simple Watercolour Hearts
This is the easiest place to start. Perfect for absolute beginners.
What you’ll paint: A page full of hearts in different colours and sizes.
Step by step:
- Sketch light pencil outlines of hearts across your watercolour paper. Mix up the sizes – some big, some small. Hearts of different sizes look more interesting than uniform ones.
- Pick your colours. Reds, pinks, purples work obviously, but any colour can be romantic. I did some blue and yellow one,s and they looked lovely.
- Wet your brush and load it with paint. The paint consistency should be creamy, not too watery.
- Paint the outline of your heart shape first, then fill in the middle. Work while it’s wet so there aren’t hard edges.
- Let it dry completely. This is the next step – don’t rush it or colours will bleed.
- Optional: Add a second layer to some hearts for depth. Or leave them light and soft.
- When everything’s dry, you can add white details with a gel pen – little dots, messages, patterns.
Why this works: Hearts are forgiving shapes. Even wonky hearts look charming. And painting a whole page of them is great practice for brush control.
Use it for: Valentine’s Day cards (cut out individual hearts and glue to card), wrapping paper, bookmarks, or just frame it as art.
Tutorial 2: Candy Heart Messages
Remember those conversation heart sweets? “Be Mine,” “True Love,” “XOXO”? You can paint those.
What you’ll paint: Pastel hearts with sweet messages.
Step by step:
- Sketch heart outlines in pencil on your watercolour paper.
- Mix very pale, pastel colours – add loads of water to your paint. Think baby pink, lavender, pale yellow, mint green.
- Paint each heart in a different pastel colour. Keep the colours super light.
- Let everything dry completely.
- Use a fine brush (or a coloured pen/marker) to write messages on each heart. Keep it simple: “LOVE U,” “BE MINE,” “CUTIE,” “HIYA.”
- Add light shading around the edges of hearts if you want them to look more 3D. Mix a slightly darker version of each colour and paint just around the edges.
Why this works: The pale colours are very forgivin,g and even if your lettering is wonky, it adds to the homemade charm.
Use it for: Cards, gift tags, or create a whole sheet of them like an actual packet of sweets.
Tutorial 3: Watercolour Heart Cluster
Instead of individual hearts, create one big cluster of overlapping hearts.
What you’ll paint: Hearts layered on top of each other to make a heart-shaped arrangement.
Step by step:
- Sketch a large heart shape in the centre of your paper – this is your guide.
- Inside and around that guide, sketch smaller hearts that overlap. Don’t worry about them being perfect.
- Start painting from the back layer forward. Paint the hearts that are “behind” first.
- Let those dry, then paint the hearts that overlap them in different colours.
- Keep layering until you’ve filled your heart-shaped cluster.
- The overlap creates depth and makes it look more interesting than flat hearts.
Why this works: Even messy overlaps look good because that’s how clusters work naturally.
Use it for: The heart of Valentine’s card designs, or frame it as artwork.
Tutorial 4: Simple Watercolour Roses
Roses sound complicated but there’s an easy way to paint them that looks impressive.
What you’ll paint: Loose, impressionistic roses.
Step by step:
- Start with a small circle or spiral in the centre – this is your rose centre. Use a darker red or pink.
- Paint loose “C” shapes around the centre. These are your petals. Don’t make them perfect.
- Add more “C” shapes radiating out, getting lighter as you go. Add more water to your paint for the outer petals.
- While everything’s wet, you can drop in a darker colour to the centre for depth.
- Add a few green marks at the bottom for leaves. Just loose brush strokes, nothing detailed.
- Let it dry. The imperfect, loose style actually looks more artistic than trying for realism.
Why this works: Loose watercolour florals are very forgiving. You’re not trying for botanical accuracy, just the impression of a rose.
Use it for: Valentine’s Day cards, bookmarks, or paint several on one sheet for a bouquet effect.
Tutorial 5: Heart-Shaped Floral Wreath
This combines hearts and flowers into one project.
What you’ll paint: Flowers and leaves arranged in a heart shape.
Step by step:
- Sketch a light-hearted outline as your guide.
- Paint small, simple flowers along the heart outline. Doesn’t matter what kind – just blobs with 5 petals work fine.
- Use different colours for different flowers – pinks, reds, purples, yellows.
- Add small green leaves between flowers. Just simple leaf shapes, nothing complicated.
- Work your way around until you’ve completed the heart shape.
- Let it dry, then you can add a message in the centre of the heart or leave it empty.
Why this works: Following the heart outline keeps everything organised, and simple flower shapes don’t require art skills.
Use it for: Valentine’s Day cards with space in the middle for a message, or frame it as is.
Tutorial 6: Watercolour Envelope Design
Make the envelope as special as the card inside.
What you’ll paint: Small hearts or flowers scattered across an envelope.
Step by step:
- Use a blank envelope (or make one from watercolour paper).
- Paint small hearts randomly across the front. Vary the sizes and colours.
- Add tiny flowers here and there between hearts if you want.
- Keep everything small and delicate so it doesn’t look cluttered.
- Let it dry completely before writing the address or putting anything inside.
- Optional: Paint the envelope flap too for extra detail.
Why this works: Small, scattered elements are easy and forgiving. Even if some are wonky, the overall effect looks charming.
Use it for: Making your Valentine’s cards extra special, or use the same technique on scrapbook layouts.
Tutorial 7: Abstract Heart Backgrounds
If realistic hearts aren’t your thing, try abstract heart backgrounds.
What you’ll paint: Loose, flowing shapes that suggest hearts without being literal.
Step by step:
- Wet your watercolour paper completely with clean water.
- Drop in reds, pinks, and purples randomly. Let them blend and flow.
- While wet, use the tip of your brush to draw loose heart shapes in the paint. The colour will follow your brush.
- Let it dry and see what patterns form. Watercolours create interesting textures as they dry.
- Once dry, you can add details with white pen or darker paint.
Why this works: You’re letting the water do the work. Even random splodges look artistic with watercolours.
Use it for: Card backgrounds, then add messages on top once dry, or use as decorative paper.
Tutorial 8: Watercolour Bouquet In A Mason Jar
A simple still-life that looks more complicated than it is.
What you’ll paint: Flowers in a jar – very sweet and Valentine’s appropriate.
Step by step:
- Sketch a simple jar shape at the bottom of your paper. Just a rectangle with a slight curve at the top.
- Paint the jar in pale blue or grey. Add a bit of darker colour at the sides for dimension.
- Above the jar, paint simple flower shapes – circles with petals radiating out.
- Use Valentine’s colours: reds, pinks, and some white.
- Add green stems coming down into the jar.
- Paint a few leaves here and there among the flowers.
- Let everything dry, then add details like highlights on the jar with a white pen.
Why this works: The jar grounds the composition, and you can paint very loose, simple flowers without worrying about them looking perfect.
Use it for: Valentine’s Day cards, small paintings to gift, or art projects for kids.
Tutorial 9: Rainbow Watercolour Hearts
Not every Valentine’s has to be pink and red. Rainbow hearts are joyful and different.
What you’ll paint: Hearts in every colour of the rainbow.
Step by step:
- Sketch heart outlines across your page.
- Paint each heart a different colour – red, orange, yellow, green, blue, purple.
- Work through the spectrum so you get a rainbow effect.
- Let dry, then you can outline each heart in a gold pen or leave them soft.
- Optional: Add patterns inside some hearts once dry – dots, stripes, whatever.
Why this works: It’s cheerful, colourful, and works for any kind of love (not just romantic). Great for kids’ art projects or Galentine’s cards.
Use it for: Cards for friends, family, or kids’ Valentine’s Day for school.
Tutorial 10: Simple Floral Card With Message
A straightforward card design that anyone can do.
What you’ll paint: Small flowers clustered in one corner with space for a message.
Step by step:
- In one corner of your watercolour paper (or blank card), paint 3-5 simple flowers.
- Use basic shapes – circular centres, simple petals.
- Add leaves around the flowers in green.
- Let everything dry.
- Write your message in the empty space. Use the painted corner as decoration.
- Optional: Add small scattered petals or hearts across the rest of the card.
Why this works: Keeping decoration to one area is easier than trying to fill the whole card. It looks elegant and leaves room for your message.
Use it for: Quick Valentine’s Day cards when you don’t have much time.
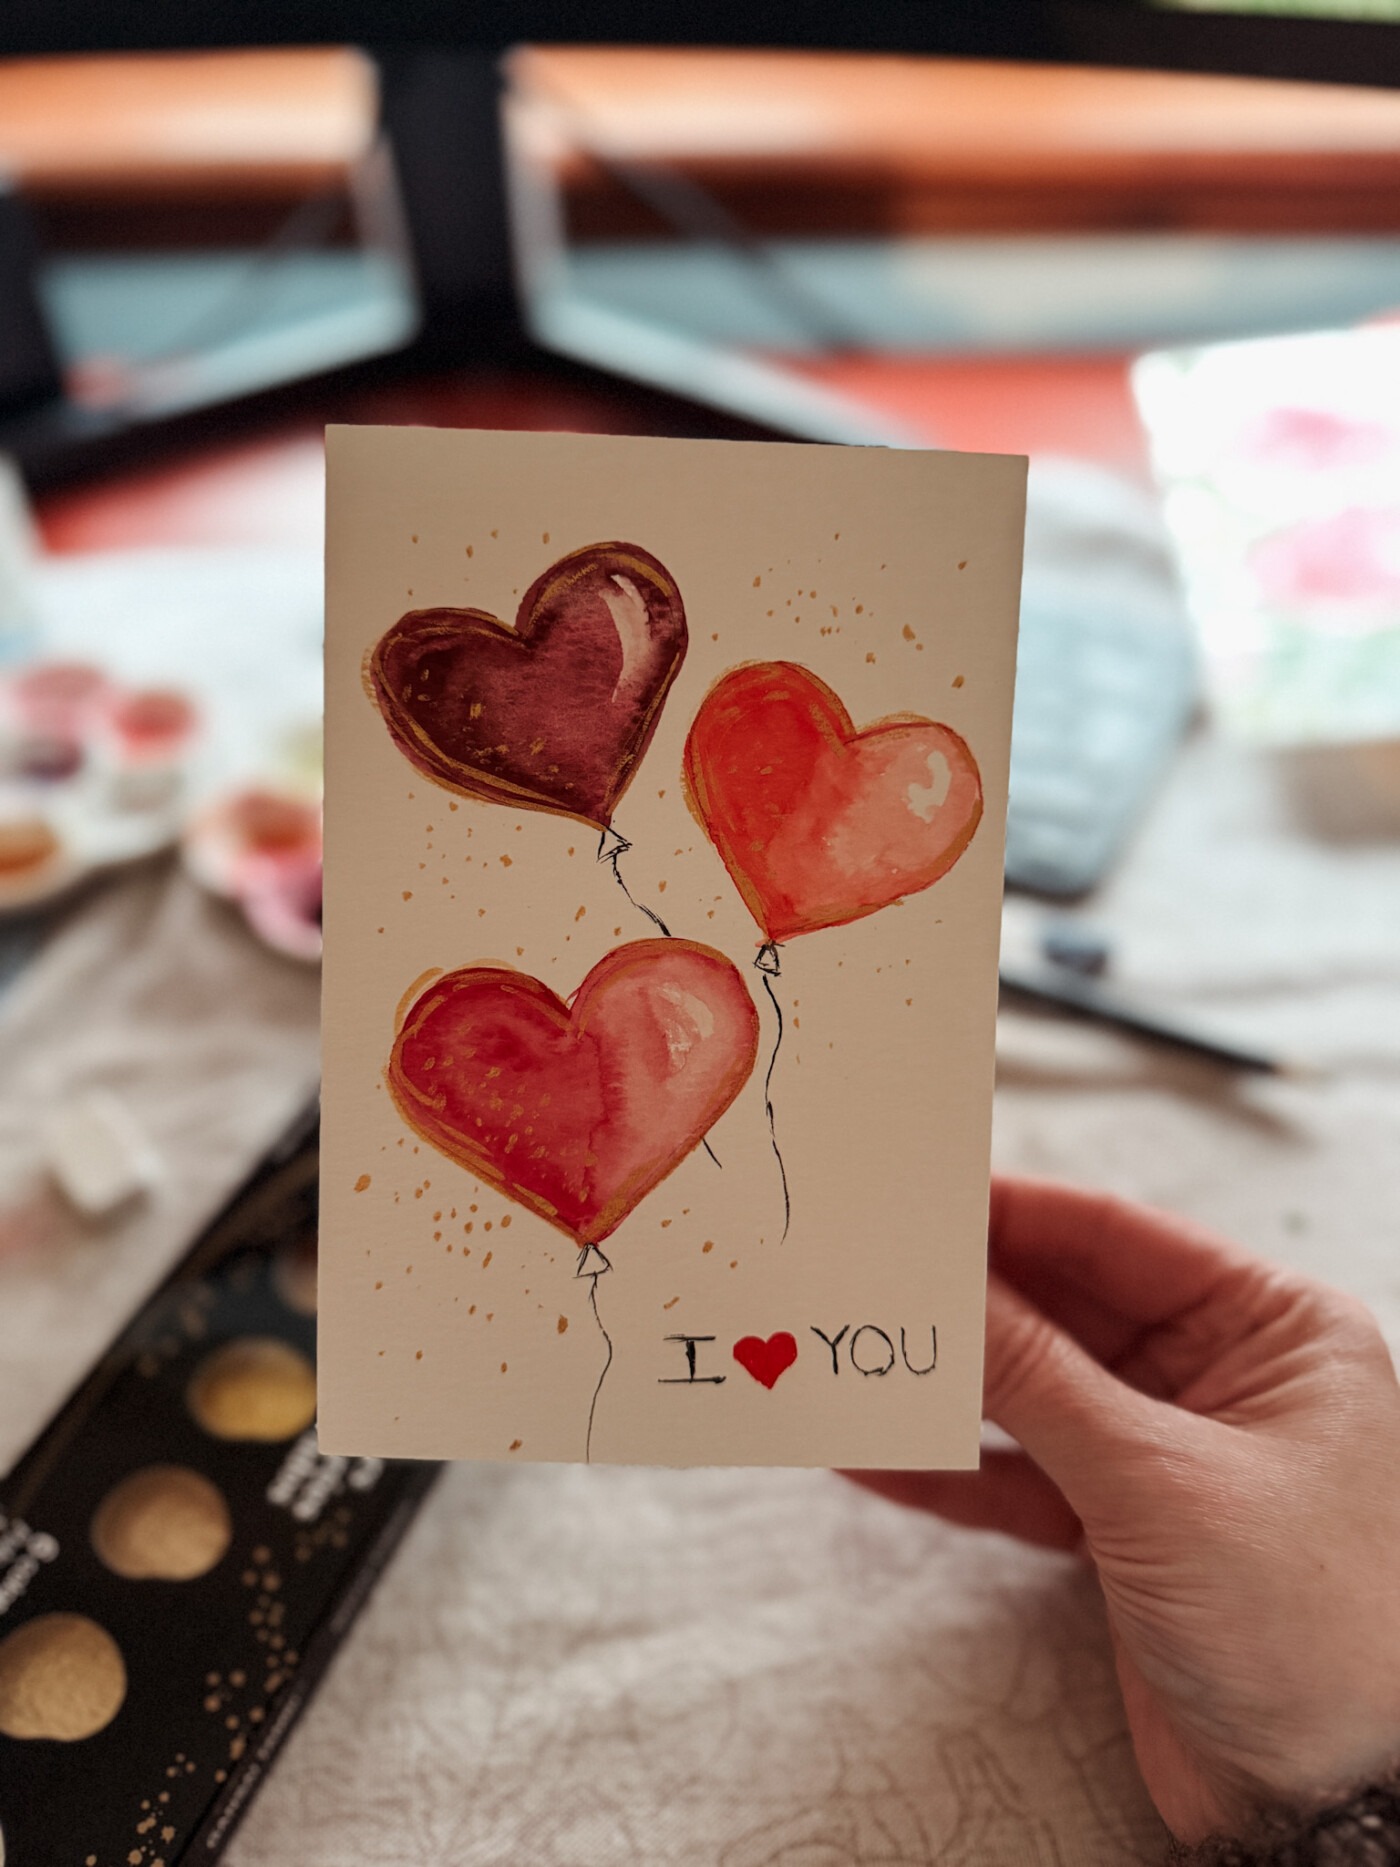
Tutorial 11: Heart-Shaped Balloon Bunch
Sweet and whimsical, perfect for Valentine’s Day.
What you’ll paint: Heart-shaped balloons floating up with strings.
Step by step:
- Paint 3-5 heart shapes in different colours at the top of your paper.
- While the paint is wet, you can let colours blend slightly where hearts overlap.
- Let the hearts dry completely.
- Using a fine brush and darker paint or pen, draw thin lines from each heart downward – these are balloon strings.
- Make the strings slightly curved or wobbly for a floating effect.
- Optional: Add tiny hearts or dots around the balloons for extra decoration.
Why this works: Balloons are cheerful, and hearts are simple shapes. The strings add movement without being complicated.
Use it for: Cards for kids, cheerful Valentine’s messages, or art projects for children to try.
Tutorial 12: Watercolour “Love” Lettering
If you fancy trying hand-lettering with watercolours.
What you’ll paint: The word “LOVE” in colourful watercolours.
Step by step:
- Sketch “LOVE” in bubble letters lightly in pencil.
- Paint each letter a different colour, or use a rainbow gradient within each letter.
- Let the first layer dry if you want clean edges, or work wet-in-wet for a blended effect.
- Add a secon,d darker layer to one side of each letter for dimension.
- Once dry, add details – dots, hearts, patterns inside or around the letters.
- Erase pencil marks when everything’s completely dry.
Why this works: Bubble letters are forgiving, and filling them with colour is satisfying. Even wobbly letters look hand-crafted and charming.
Use it for: The centrepiece of a Valentine’s Day card, or frame it as word art.
Tips For Making Your Watercolours Look Better
These apply to all the watercolour tutorials above:
Use good paper: Watercolour paper really matters. It’s the one thing worth spending a bit more on. It holds water without buckling, and colours look brighter.
Don’t overwork it: Watercolours look best when they’re fresh and loose. If you keep fussing, colours get muddy.
Let layers dry: If you want clean shapes, let each layer dry before adding the next step. If you want colours to blend, work wet.
Add details last: Paint the main shapes first, let them dry, then add details with fine brush or pen.
Use a flat surface: Keep your paper flat while painting so water doesn’t pool in weird places.
Test colours first: Paint a little swatch on scrap paper to see how it dries. Watercolours dry lighter.
Clean your brush between colours: Dirty water makes muddy colours. Keep two jars – one for rinsing, one for clean water.
Embrace imperfection: The best part about watercolours is that they’re meant to look loose and organic. Wonky hearts are charming.
Making Valentine’s Day Cards From Your Paintings
Once you’ve painted something you like, here’s how to turn it into cards:
Option 1: Paint directly on cards. Buy blank watercolour paper cards (they exist!) and paint directly on the front. Let dry, write your message inside.
Option 2: Paint on paper, then cut and glue. Paint your design on watercolour paper, let it dry completely, cut it out, and glue it to the front of a blank card. This lets you paint a bunch at once and assemble cards later.
Option 3: Make your own cards. Fold watercolour paper to card size and paint on the front. The paper might be a bit thick, but it works.
Option 4: Scan and printIf you paint something you really love, scan it or photograph it, then print copies to make multiple cards. Not as special as originals, but practical if you need lots.
Adding messages:
- Write directly on the watercolour paper once it’s bone dry
- Use gel pens for writing on dark colours
- Add a white background shape for your message so it’s readable
- Or glue a small piece of white paper on top for your message
Creative Ideas Beyond Cards
These watercolour tutorials aren’t just for Valentine’s Day cards. Here are other ways to use them:
Bookmarks: Paint on watercolour paper, cut into bookmark shapes, and laminate if you want them to last.
Gift tags: Small paintings make perfect gift tags. Punch a hole and tie with ribbon.
Art prints: Paint a larger version and frame it as artwork for your home.
Wrapping paper: Paint designs on large watercolour paper sheets (or regular paper if you’re careful) to wrap small gifts.
Scrapbook layouts: Use watercolour hearts or flowers to decorate scrapbook pages.
Phone wallpaper: Photograph or scan your painting and use it as your phone background.
Art projects for kids: These tutorials are simple enough for children. Great for school Valentine’s projects or rainy day activities.
Galentine’s cards: Not all Valentine’s Day is romantic. Make cards for your mates, your mum, your gran, and your best friend.
Practice pages: Just paint sheets of hearts and flowers for practice. Keep them in a folder to track your progress.
Common Watercolour Mistakes (And How To Fix Them)
Problem: Colours look muddy
Fix: You’re mixing too many colours or overworking the paint. Use fewer colours and let the water do the blending. Also, clean your brush between colours.
Problem: The Paint is too pale
Fix: You’re using too much water. The paint consistency should be like single cream, not water. Add more pigment.
Problem: Hard edges everywhere
Fix: Work faster while the paint is wet, or deliberately let layers dry between applications if you want clean edges.
Problem: Paper is buckling
Fix: Use heavier watercolour paper (at least 140lb/300gsm) and tape it to a flat surface while painting.
Problem: Colours are bleeding where you don’t want them
Fix: Let the first colour dry completely before painting next to it, or use less water so the paint doesn’t flow as much.
Problem: Can’t get fine details
Fix: Use a smaller brush, make sure the paint isn’t too watery, and add details after everything else is completely dry.
My Honest Take On Watercolour For Valentine’s Day
I’ve been doing watercolours for a few weeks now (I started on January 5th), and Valentine’s Day projects are brilliant for beginners. Here’s why:
Hearts are forgiving: Even wonky hearts look intentional and handmade-charming.
Colours are fun: Valentine’s colours are lovely to work with – all those pinks and reds are cheerful.
Quick projects: You can make a card in 20 minutes. That’s achievable even if you’re busy.
Low stakes: It’s a card, not gallery art. The pressure’s off.
Practice without pressure: You’re making something useful (a card) so it doesn’t feel like you’re just practising for no reason.
The best part about watercolours is that they’re quite forgiving of mistakes. That blob of paint that went wrong? It’s a “happy accident” (thanks, Bob Ross). That heart that’s lopsided? It’s got character. That colour that bled into another? It created an interesting effect you couldn’t have planned.
Whether you’re making cards for a partner, your kids’ Valentine’s for school, cards for mates, or just want a creative project, these watercolour tutorials are genuinely doable. You don’t need to be artistic. You just need watercolour paper, some paint, a brush, and a willingness to have a go.
The heart of the internet is full of perfect Pinterest-worthy watercolour paintings. But honestly? The wobbly, homemade ones are more special. They show you took time to make something rather than just buying it.
So grab your supplies, pick a tutorial, and have a go. The better way to learn is by doing, and Valentine ‘s-themed projects are the perfect excuse to start.
FAQ
What supplies do I need for Valentine’s watercolour tutorials?
For Valentine’s watercolour tutorials, you need watercolour paper (at least 140lb/300gsm weight – this is essential), a basic set of watercolours (pans or watercolour inks work), at least one round brush, water jars, and a paper towel. That’s genuinely all you need for the best results. Optional extras include a white gel pen for adding messages, a pencil for sketching, and masking tape to secure your paper to a flat surface. You can do these art projects for under £15-20 if buying new supplies. The watercolour paper is the most important investment – regular paper won’t work as it buckles when wet.
Are these watercolour tutorials suitable for complete beginners?
Yes! These Valentine’s watercolour tutorials are designed for absolute beginners. The best part is that Valentine’s Day projects use simple shapes like hearts and basic flowers that are very forgiving. You don’t need prior art skills. Each tutorial uses basic techniques and the next step is always clearly explained. Hearts of different sizes, simple florals, and abstract designs all work well for beginners because even “mistakes” look charming. If you’re nervous, start with the simple watercolour hearts tutorial – it’s the easiest and builds confidence for more complex craft ideas.
Can I use these tutorials to make Valentine’s Day cards?
Absolutely! These watercolour tutorials are perfect for making Valentine’s Day cards. You can paint directly on watercolour paper cards, or paint on regular watercolour paper, then cut and glue your designs onto blank cards. Many tutorials include ideas for adding messages and creating scrapbook layouts. The candy hearts, floral designs, and heart clusters all work brilliantly as card designs. You can also use them for gift tags, bookmarks, or small art prints. Working on a flat surface and letting each layer dry before adding messages gives the best results for cards.
What if I don’t have watercolour paper – can I use regular paper?
Watercolour paper really matters for these tutorials. Regular paper will buckle, pill, and potentially tear when wet. Watercolour paper is designed to handle water and shows colours more vibrantly. It’s worth the investment – you can buy individual sheets quite cheaply to start. If you absolutely can’t get watercolour paper immediately, use the thickest paper you have and use minimal water (more paint, less water). But honestly, watercolour paper makes such a difference that it’s the one supply worth spending on. Get at least 140lb/300gsm weight for the best results with these watercolour tutorials.
Can kids do these Valentine’s watercolour tutorials?
Many of these watercolour tutorials work brilliantly as art projects for kids! The simple watercolour hearts, candy hearts, rainbow hearts, and heart-shaped balloons are all kid-friendly. Children love the creative ideas, and the process is forgiving. Set them up with watercolour paper on a flat surface, give them watercolour inks or regular watercolours, and let them experiment. The next step after painting is decorating cards for friends and family. It’s a better way to celebrate Valentine’s Day than buying shop cards, and kids genuinely enjoy the creative process. Just expect mess and embrace the “happy accidents” – that’s the heart of watercolour art!